Shower Sump Pump
Ok - that’s nasty!
I had a new HVAC unit installed as part of the ‘pre-delivery’ work. Looking at that messiness (HVAC guy claimed all was well, but yet when my mechanic went to sanity check all systems - bad sea pump…so how well did the HVAC guy even check his work? :( ), yes, I should have done this one myself, especially for the cost involved, but there were enough known boat projects to come, so I wanted to get it done and ready for bringing it to the slip and some wife time on the boat.
Besides giving everything a truly deep cleaning and scrubbing and once-over (which net some good things, like finding the Sunbrella floor mats, and the cutting board I had assumed was a goner), Kevin had pointed out some wetness in the sump pump area (underneath the cabin step), and had mentioned he’d checked the pump and it was coming on, but to keep an eye on it, so - I did. And good thing, as not too long from then, this is what I found….
Now, in reality - this is a pretty simple device, but being relatively new to boat wrenching, it took me …. longer …. to sort. I had everything going through my head from maybe the hull has a slow leak, to the kitchen or bathroom sink or water lines having a leak, and basically all over the place.
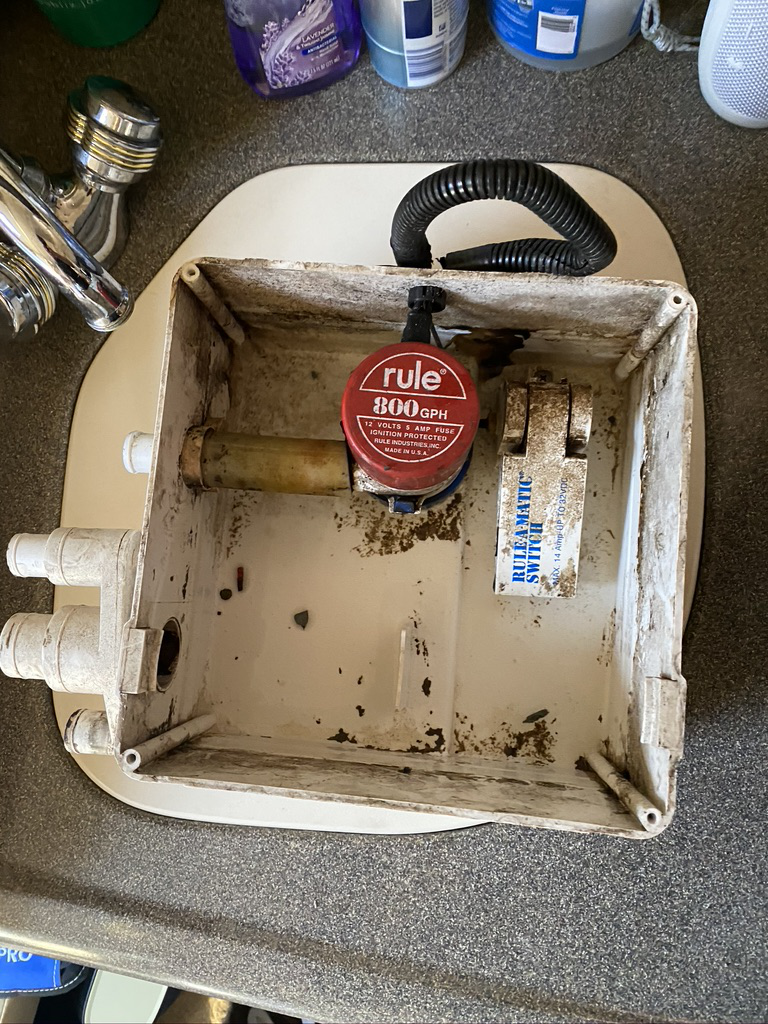
It took a bit of digging, as apparently some models may have the bathroom or kitchen sinks plumbed into the sump, but on our 1998 SDA 270, both of those plumb direct overboard, while the only inlets are actually as labelled - the shower drain in the floor, and the HVAC condenstate line.
Pulling the top apart it was quite nasty, which can partially be seen by the removable screen.
The pump itself is a Rule 800 GPH pump with 3/4” outlet, with a replace-able float switch. After trying to sort just what was going on here (every few hours, it would fill back up…while manually pulling up on the float would in fact engage the pump), chasing lines in what is a very cramped and awkward space (note - the top step is removable and I would highly suggest removing it. I did NOT and paid for it constantly..), I decided to replace the whole unit, as it was possible the leak was coming from the box itself or the discharge line, or so I was thinking.
After deciding to replace the entire box and pump for good measure, one thing worth noting is the old part has been superceded/re-worked but is still a Rule 98B. As the box is in there fairly tightly fore/aft, I was looking for the original part if possible, and had ordered one but still wound up with the new part.
You can see the comparison to the one I pulled out left and the replacement unit on the right, below.
I went ahead and removed the box, scrubbed it and re-packaged for future emergency use of either the pump or the switch.
The new box, by comparison, changed the filter style from a tube to a curved sheet. The inlet and discharge are different, but more or less identical, unless you happen to need to block off one of the inlets off - as there are no ‘plugs’ included in the kit so a trip to Lowes or Home Depot would be needed, although different sized fittings do come with the box.
The vertical space to get in and out of the void is limited, so I nipped the front mounting bracket off a bit (you can see the beginning of this in the picture to the side - I just trimmed down to the braces).
Now, for the ‘surprise’ which definitively ‘found the leak’ - the HVAC condensate line had been on there tightly enough that it was extremely difficult to come off, but I noticed two things:
-
The black condensate line was in fact a clear line….with years of built-up crud. I’m told adding bromine tablets into the condensate tray can help with this and will be investigating.
-
The condesate line itself was slightly undersized to the box inlet, and had a split on the bottom of it. As I didn’t have a smaller OD fitting available for the box, I used a heat gun gently to soften up the newly cut line and eased it initially on to the original box, let it cool, then put onto the new box’s fitting and clamped it down. It wasn’t much undersized, but enough it had split over time, and the plastic type of line may be reasonably curable but isn’t particularly stretchy. I may replace it with a silicone or other suitable slightly larger ID line in the future.
I did learn a few lessons along the way:
-
The float switch goes up much higher than I would expect before it engages. I’m sure a spacer or something under the float’s leading edge could adjust this somewhat, but by default it only activates as the entire box is just about full - in the pic immediately above, you can see there is water in the box and the float is at or beyond parallel to the bottom of the box, and it is not yet engaging the pump. This is normal..
-
using a kid’s water-cannon type toy actually worked better than a manual bilge pump to drain the void occasionally. I had started with a TL-600, but the TL-750 to the right is about the right size.
The wiring is pretty straight-forward, although as the instructions allude to, there is a ‘loop’ which basically puts the float into the circuit of the pump, so it acts as a switch should, interrupting the pump from seeing power when not at the top of it’s range, and then providing power to the pump at ‘full stroke upwards’, i.e. floating to the top of the box. You can test the pump and float once wired quickly by lifting up on the float to the top of it’s upward movement.
I took the wire loom from the existing box ‘loop’ wiring to re-use, along with another piece of wire loom I had on hand. There seems to be some disagreement on types of connectors to use for marine wiring, including some claiming that solder is brittle, but I chose to go with some heat-activated shrink-wrapped solder joints, with additional heatshrink tubing, loom and electric tape - I’m not seeing any likely issues to occur, but always open to better ideas. Note - I did use a heat gun and not a lighter…although I have used a lighter for general heat shrink in the past, I wanted to make sure both the solder melted into the wires and I didn’t melt through the outer seal.
The screws to keep the box attached to the boat were annoying, just as they were to get out, although in this case, with the box being slightly different, they provided a small piece of plastic with screwholes in it for the port side, and an existing hole on the starboard side, in addition to the bracket I had to trim down (facing towards the bow). Coated these in fast-dry 5200 and it’s in.
Links to the heat gun I use and some heat-activated solder joints with heat-shrink are below
Most importantly - no more water filling up that void area, so replaced some parts perhaps needlessly, but it’s done, and hopefully problem-free for some time to come now.
